How to manually replace the Nexus 5 battery


We recently showed you the great Limefuel extended battery case for the Nexus 5, which will more than double the runtime of your Google phone. But perhaps your internal battery is simply kaput and a battery case isn't going to fix the problem. If you don't want to send your Nexus 5 in for a slow repair job or you've voided your warranty already and don't want to pay someone to do it - or you simply like tinkering around in the belly of the beast - you can easily remove the Nexus 5 battery yourself, even if it is technically non-removable. If you are having issues with a Nexus 5 battery that is not working properly or not charging, here's how to replace a Nexus 5 battery manually for an easy fix.
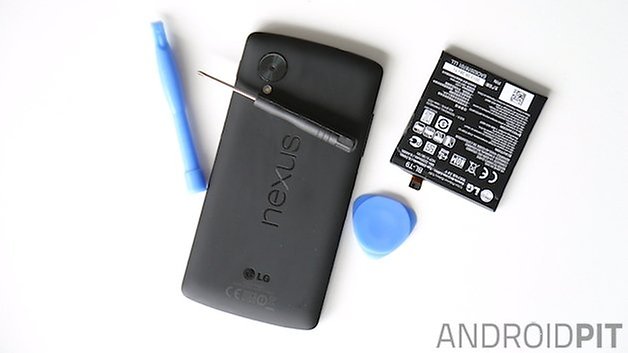
All you need is a replacement battery for the Nexus 5 and a little plastic tool to help you pry open the rear battery cover. You should be able to pick one of these up at a craft store, or you can simply use a plectrum (guitar pick). You can buy a Nexus 5 battery replacement kit from plenty of online sources, but we picked one up from Amazon for under 20 USD (currently just 6.50 USD).
Note: I'm sure I don't need to remind you that replacing a non-removable battery yourself is not recommended unless you're ok with the possible consequences. While the process is very simple, AndroidPIT will not be held accountable if you break something. Please proceed with caution.
How to manually replace the Nexus 5 battery
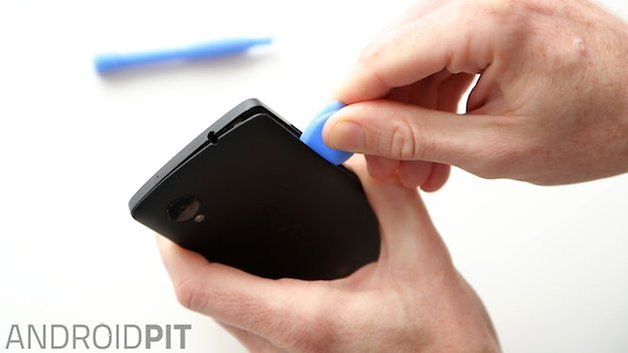
1. First, you need to use the plastic tool to wedge between the rear cover and the edges of your Nexus 5. Make sure your phone is off first of course! Once you've levered the rear cover away the whole way around the edges you can pop it off.
2. Next, just remove the six tiny screws around the top part of the internal black plastic cover you find underneath. Make sure you don't lose them.
3. Remove the black plastic cover.
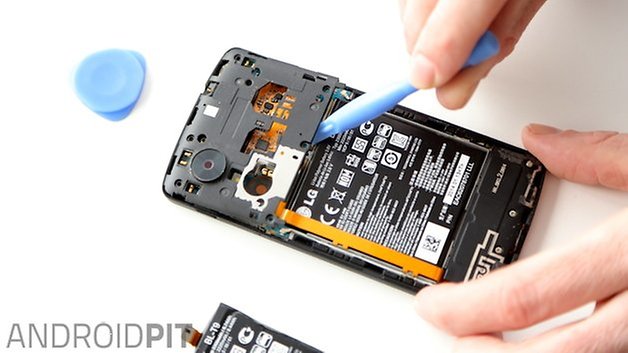
4. All you need to do now is gently lever up the two little ribbons from the existing battery to the component board underneath. Be careful and they will both gently pop off.
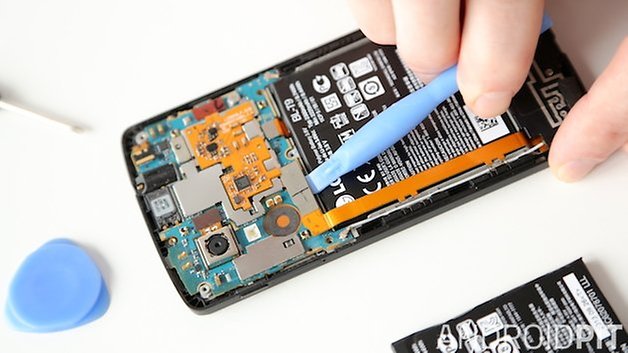
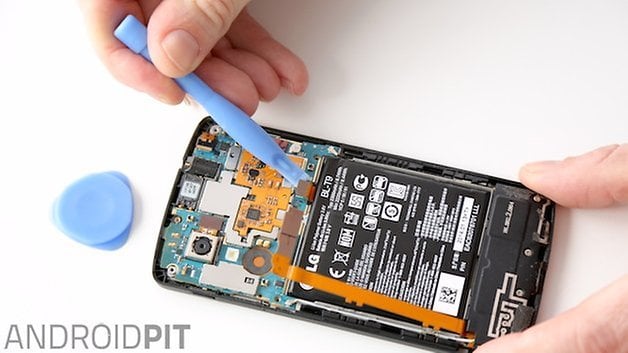
5. Now, using the same plastic tool, work your way around the edges of your battery to detach it from the inside of the chassis. Take your time and don't be too forceful. Eventually the bond will weaken enough and the battery will just pop out.
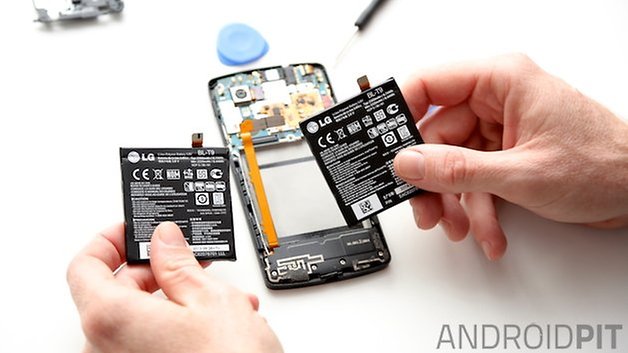
6. Now, place your replacement Nexus 5 battery in the chassis and gently reconnect the two ribbons to the motherboard (using your fingers here is easier). Replace the little black plastic cover and reinsert the six screws. Pop the rear cover back on and start up. That's it, 2,300 mAh of fresh-out-of-the-box Nexus 5 battery action!
Check out our battery saving tips for any Android smartphone.
How's the battery on your Nexus 5? Have you ever had to replace a non-removable battery before?


I successfully replaced the battery thanks to these excellent instructions. Everything seems to be working normally except for one thing: I have been using a wireless charger for some time and now it will no longer charge that way (not on another family member's wireless charger either). So something is missing. It's charging on a wire ok.
The back cover contains the wireless charger. You need to press it in the middle around the X o nexus to reconnect it to the main board.
Hope it helps
Thanks, really helpful and simple instructions. I found the first comment helpful too, the batter is definitely best removed from the bottom and the sides rather than the top section. Thank you.
I just successfully replaced the battery of my Nexus 5. I obtained the battery from Encompass (the only LG parts distributor on the East Coast). Definitely a genuine LG battery (I did my homework) but I was worried about its shelf-life (it had a December 2015 manufacture date). I was very relieved after installation when it still had a 40% charge before I connected the charger. A few hints from my experience: 1) My back cover had adhesive at the bottom, but also on the rt side below the power button. Starting with the audio jack, I popped all the other edges (including the bottom) before I could get the right side off. 2) Guitar picks were superior to the plastic levers that come in kits at every stage except possibly the electrical connections. 3) If you are nearsighted and wear contacts or glasses, TAKE THEM OFF and you will be able to see the tiniest detail. 4) My battery was glued in primarily along the sides. Mostly by prying with the guitar pick on the rt side where there is the biggest gap and the least amount of fragile stuff, my battery popped out (intact and unbent) MUCH sooner than I had anticipated having viewed probably all the how-to videos on YouTube. I DO NOT recommend prying from the top, as the battery tends to fold there and there is fragile stuff where your tool will fulcrum on the phone components. 5) Be careful when putting the screws back in. There are holes of approximately the same size nearby that probably do delicate and important tasks. If I hadn't taken out my contacts I could easily have made a bad mistake.
Excellent instructions, thank you! Now I'm just crossing my fingers that Amazon sent me a decent battery! It had virtually zero charge, but I guess that's normal?
This was a great help - thanks. I had to use a screwdriver to get the battery out though, it was in so tight it broke the plastic things. I bought the battery that cost £6 on Amazon and it DOES have temperature sensor. Appears in all ways to be genuine, including an LG serial printed on the reverse metal side.
Just done this - perfect. 10 minutes to fit new one. Paid £20 for a battery as some of the eBay /Amazon £6 ones don't have the temperature sensor (some comments say the cheaper ones are fakes). Also I bought the kit - but if you don't want to all you need is a plectrum, small spectacles-screw-size Philips screwdriver and poss. a larger one to use as a lever. When I got the battery out I levered from the bottom of the battery only - means you won't damage the wires around the side. I also attached the battery cable first, then lowered the battery in from the bottom - the cable then tucks in behind the battery.
Many thanks for the very clear explanation. I was able to change my battery without any problem.
now I know the meaning of "work your way around the edges of your battery to detach it from the inside of the chassis" is. thanks man, it really helps.
Thanks a lot!
Did it tonight. Easy peasy. Buying a little kit of tools from Fry's helped....
Thanks for this guide. Really helpful.
Thanks for the info. It was gr8. I changed the battery myself !! :-)
Great story, I would not have risked it without reading it and realizing it was fairly easy..
Hey good article! But once i replaced the battery and popped the cover back on, it doesn't turn on. I tried to charge it but works for 5 seconds and then it turns off and then on again. Has been doing this as long as was plugged. Can you help me? thank you
Mine did the same thing. Were you able to fix this problem?
Hey guys i need your help!! I did rplaced the battery of my N5 with a genuine LG battery. After closing the case I restart the phone but now seems that the signal of 3G it is almost disappeared and the H signal is not good too. I think I jaguardise the some element of the antenna. Could you please help me resolve this issue???!!
I believe that the antennae run down the side of the battery. May need to check the connections.
Thanks for the article. It was very helpful.
Is there anything special I have to do to reset battery statistics in the operating system after I've replaced the battery (e.g. let it drain until it turns off and then charge it)?
Scott, I would let the battery drain below 20% and give it a full charge. Do this a couple of times, then charge as usual. It is recommended to do a full charge from below 20% once a month.