How to root the Nexus 5 on Android Marshmallow


If you've updated your Nexus 5 to Android 6.0 Marshmallow and want to root it, we have the tutorial for you below. The tutorial is for a Nexus running Android 6.0 and will work for any of the most recent builds (regardless of the monthly security patch number). We're rooting a Nexus 5 on build number MRA58N, and we'll also be installing a custom recovery to do it.
Prerequisites
There are a few things you need before we get started: an unlocked bootloader, USB Debugging enabled and ADB Tools installed on your computer. Please note that unlocking the bootloader will wipe your device, so please back up your data first.

How to install a custom recovery on the Nexus 5
Because we're not rooted at this point, we'll need to flash a custom recovery without root. The steps below will take you through installing a custom recovery, flashing a rootable kernel (I'll be using ElementalX but there are others you can substitute) and then rooting your Nexus 5 with SuperSU installed.
1. On your computer, download TWRP for the Nexus 5.
2. Rename the file you just downloaded to recovery.img (if your computer doesn't show the .img extension just rename the file to recovery) and move it to the ADB Tools folder where the ADB and Fastboot files are located.
3. Grab your Nexus 5 and reboot to the bootloader. To do this turn it off, then press and hold Power and Volume Down until you see the menu with Start written in green. This is Fastboot mode, also known as the bootloader.
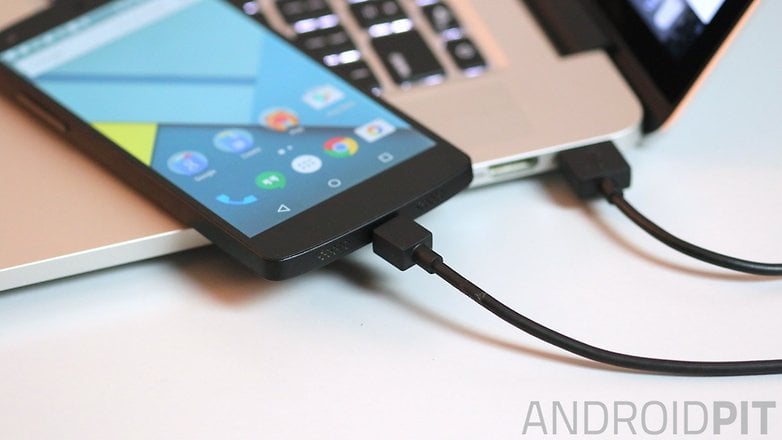
4. Connect your Nexus 5 to your computer with a USB cable.
5. If you followed the tutorial above, you should have an unlocked bootloader at this stage. If you don't, you can do it now, but be reminded that the process wipes your device, so again, make sure you have a backup of your data. If your bootloader is already unlocked, skip the next two steps and continue with flashing TWRP (step 8).
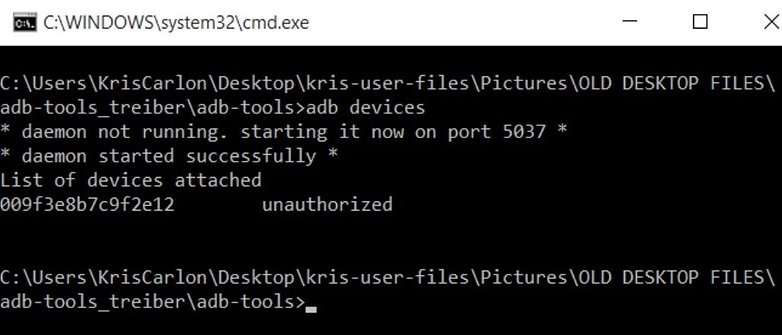
6. To unlock the bootloader, navigate to the ADB Tools folder on your computer, hold the Shift button and right-click the mouse, and select Open command window here. Type: adb devices to ensure your Nexus 5 is recognized. If it isn't, make sure you have the correct drivers installed on your computer and try again.
7. In the command window, type: fastboot oem unlock
8. Now we can flash a custom recovery (TWRP) via Fastboot. In the command window, type: fastboot flash recovery recovery.img
9. Disconnect the USB cable once the recovery file has finished writing.
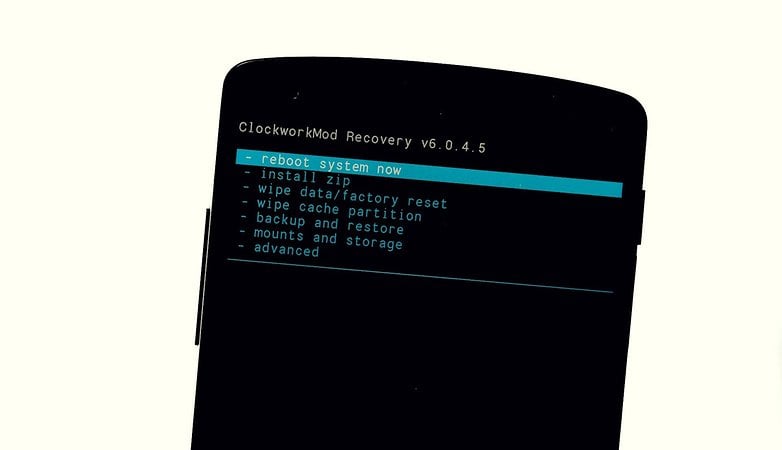
10. On your Nexus 5, use the volume buttons to highlight recovery and press the Power button to select it.
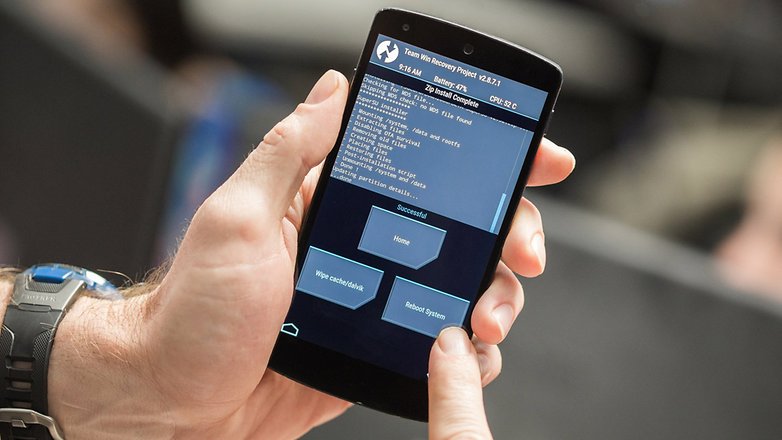
11. On the TWRP screen, swipe the slider to the right to make TWRP your default recovery.
12. In TWRP, tap Reboot > System but do not let TWRP try to root your phone.
How to root the Nexus 5 on Marshmallow
Now you can download a rootable kernel and SuperSU for your Nexus 5, which you can now flash through custom recovery on your phone. As mentioned above, I'm flashing ElementalX kernel but you can substitute another if you wish.
1. On your Nexus 5, download ElementalX kernel and SuperSU 2.52.
2. Once you've downloaded both files, reboot your Nexus 5 to the bootloader again (turn it off, press and hold Volume Down and Power).
3. Now, use the volume buttons to highlight recovery and press Power to enter TWRP.
4. Tap Install and navigate to the kernel you downloaded (unless you moved it, it should be in your Downloads folder).
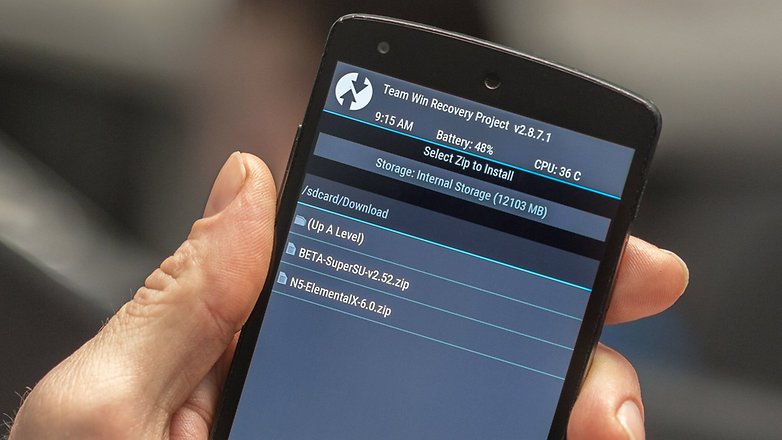
5. Tap the kernel file and slide the slider to flash it.
6. Once the kernel has been flashed, tap the home button.
7. Tap Install and navigate to the SuperSU file (which should also be in your Downloads folder).
8. Tap the SuperSU file and slide the slider to flash it.
9. Once it has completed, tap the Reboot System button.
10. Once your Nexus 5 has rebooted, go to the Play Store and install Root Checker to verify you now have root. When you get a green pass message, you're done (just be sure to grant Root Checker's superuser request when you launch the app).
What's the first thing you're going to do with a rooted Nexus 5?


[RESOLVED] Stuck in a bootloop pls help!
I tried a bunch of different methods to root my nexus 5, but I was unable to reach the final steps until these instructions. I did everything here, but with updated twrp, kernel, and SuperSU. Now I am stuck in a bootloop and I dont know what to do. Please help
-twrp-3.0.3-0-hammerhead.img
-BETA-SuperSU-v2.52
-ElementalX-N5-6.27
Solution: flash back to latest stock
This works for me on 6.0.1, using the files described, however the USB no longer gets recognised after the elementalx kernel gets installed. I saw another post on upgraded files being used, but this also didnt work. The updated files I used are:
- twrp-3.0.3-0-hammerhead.img
- ElementalX-N5-6.27
- SuperSU-v2.79-201612051815
Any pointers? The wifi functionality appears to be broken using the new files, not sure, no networks are showing up now... :(
So I got this working. I started again using a factory reset, then did the exact procedure but omitting the ElementalX step. Everything (inc USB, wifi etc) appears to be working fine now.
followed everything on the list. surprise surprise! it doesn't work. avoid this instruction.
I'm pretty sure it is because of the old kernel for 6.0.0. If you have 6.0.1 then download the new kernel: [KERNEL] [Dec 7] ElementalX 6.27 (Marshmallow) on XDA
Also, there is a new version of TWRP: twrp-3.0.2-0-hammerhead.img
And SuperSU: [STABLE][2016.09.01] SuperSU v2.78 on XDA
Its not working.
Flashing the recovery on the device essentially doesn't work. Recovery is not an available tool on the adb tools bootloader. So whenever i try to apply get it to install the new recovery img it just gives me a list of commands and doesn't do anything.
Please help my phone isnt loading android and i cant download kernel and/or su in the phone
Same with me. Did you able finally to finish process?
The first thing ill do is HIBERNATE GOOGLE APPS which are always running ever when your phone is off
Muchas gracias al equipo androidpit, trabaja de maravilla, Excelente trabajo.
thanks to androidpit team, works grat, good job
works great !
Please ... I rooted my mobile with TWRP ... Is it a big problem?
Now it is loading screen all the time ...
Thank you so much for this tutorial!!!!!!!
Will I still get OTA update notification after root?
You don't have to Miss Carli...but by rooting your phone (if your not hip to it) it allows you to not only customize it like you've never known,but you can also download certain REALLY COOL apps that you couldn't download unless your phone was rooted! Those are just a couple reasons...so if you'd like to learn more...GOOGLE IT GIRL!!
It works! :)
Any news about root Moto X 2014 on Marshmallow?