How to make your Nexus 5 screen bigger
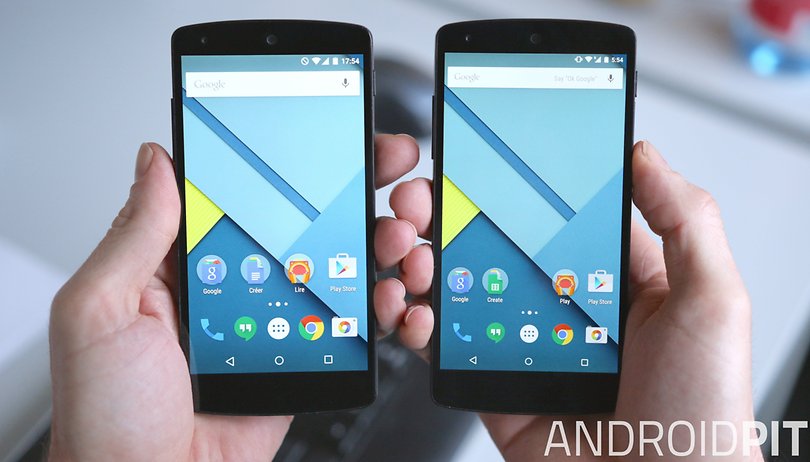

If you're perfectly happy with the size of the Nexus 5 but find yourself looking enviously at all those 5.2 and 5.5-inch screens floating around right now, today is your lucky day. We're going to show you how to grow your Nexus 5 screen. OK, not really, but we will show you how to change the display resolution so it looks like a bigger screen.
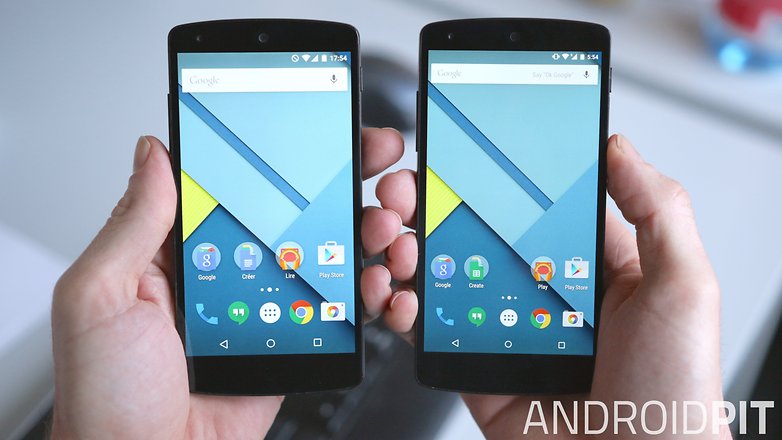
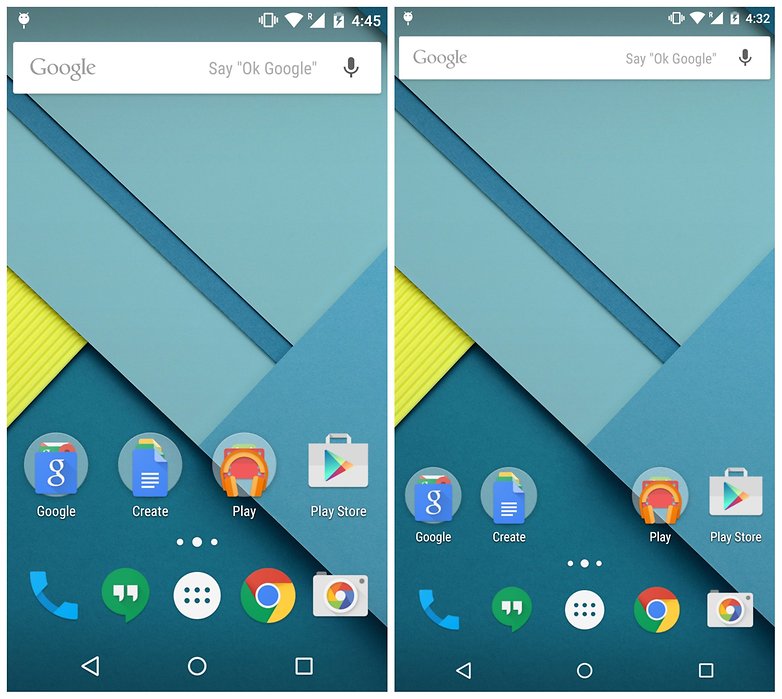
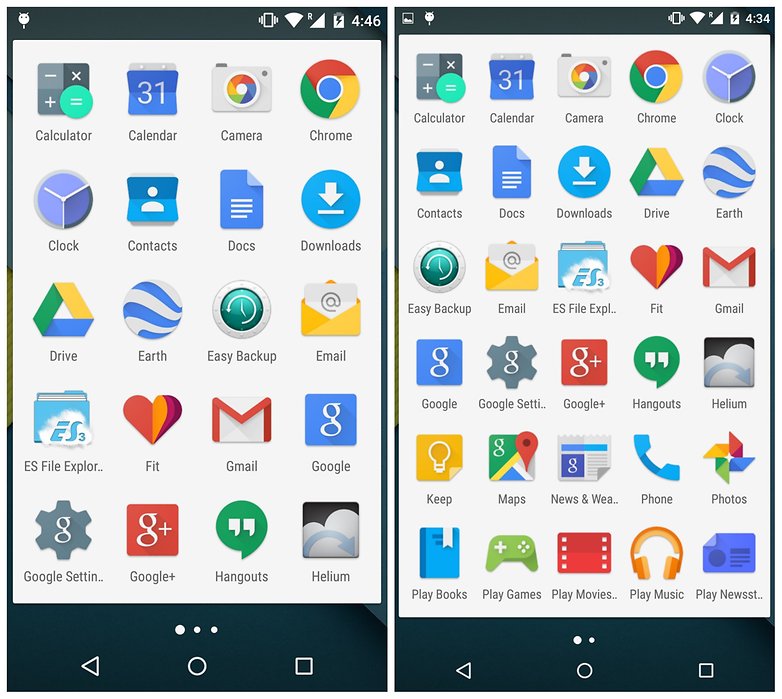
The process is surprisingly simple: all you need to do is change the pixel density of the Nexus 5. The native screen density of the Nexus 5 is set at 480 (whereas the physical screen resolution is 445 pixels per inch). This mod allows you to change that value to whatever you like – making everything on-screen larger or smaller. You can very easily go from five app icons across the screen to six app icons. You can do this whether you are rooted or not and we'll show you both methods below.
Change Nexus 5 screen density (non-rooted)
To change the pixel density without root access, you'll simply need to use an ADB command. ADB is the Android Debug Bridge and it allows you to issue commands on your phone via a computer.
1. Enable USB Debugging on your Nexus 5.
2. You'll need to download ADB Tools on your computer if you don't already have it.
3. Connect your Nexus 5 to your computer with a USB cable. If prompted to accept your computer's RSA key, say yes.
4. On your computer, navigate to the ADB Tools folder. In some blank space, hold Shift and right click. Select Open Command Window Here.
5. Confirm your Nexus 5 is recognized by typing the following command (you should see a number in the command window afterwards):
adb devices
6. Type the following command (and then reboot your Nexus 5):
adb shell wm density 400
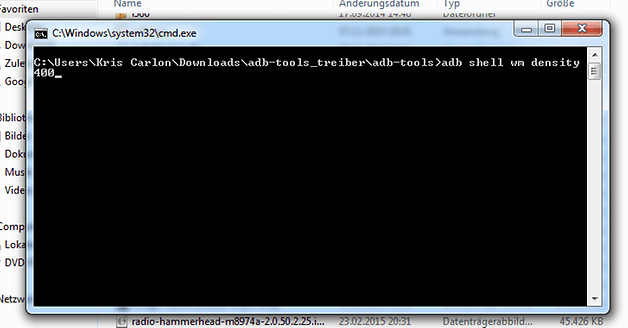
7. You can change the value to whatever you like – the lower the number the more space you have on-screen. 380-400 opens things up nicely and provides plenty of ''breathing room.'' You can go smaller if your eyesight can handle it or slightly larger if you don't want five app icons across the screen.
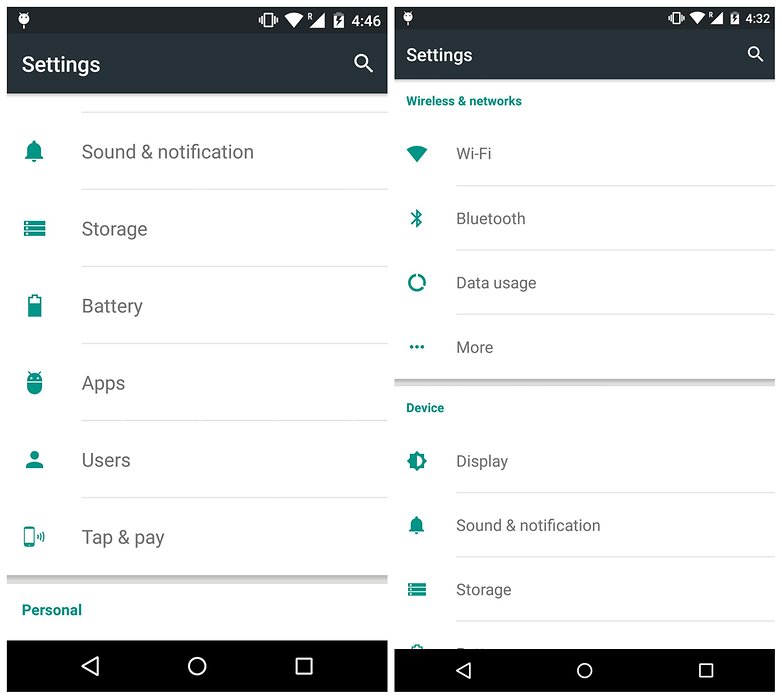
8. If you find the text is now too small you can go to Settings > Display > Font Size and increase it to your liking. You also have an option for Large Text in your Accessibility settings.
9. It is a good idea to test various densities through ADB and then make your final selection by editing the build.prop file. This, however, requires root. Editing the build.prop file does seem to clear up visual glitches that some users have experienced when simply making the change through ADB, but it works best if you reset your density before doing so.
10. If you want to reset your screen density, simply connect to ADB again and type the following command, then reboot:
adb shell wm density reset
Change Nexus 5 screen density (rooted)
This method doesn't suffer from any of the visual glitches some have experienced on the non-root method above. You do this by manually editing the build.prop file in your Android system.
You can do this easily enough with ES File Explorer with Root Explorer mode enabled, or you can do it via a ROM management app like ROM Toolbox Lite, available for free from the Play Store.
ROM Toolbox
1. In ROM Toolbox Lite, simply swipe to the Performance tab and tap build.prop editor.
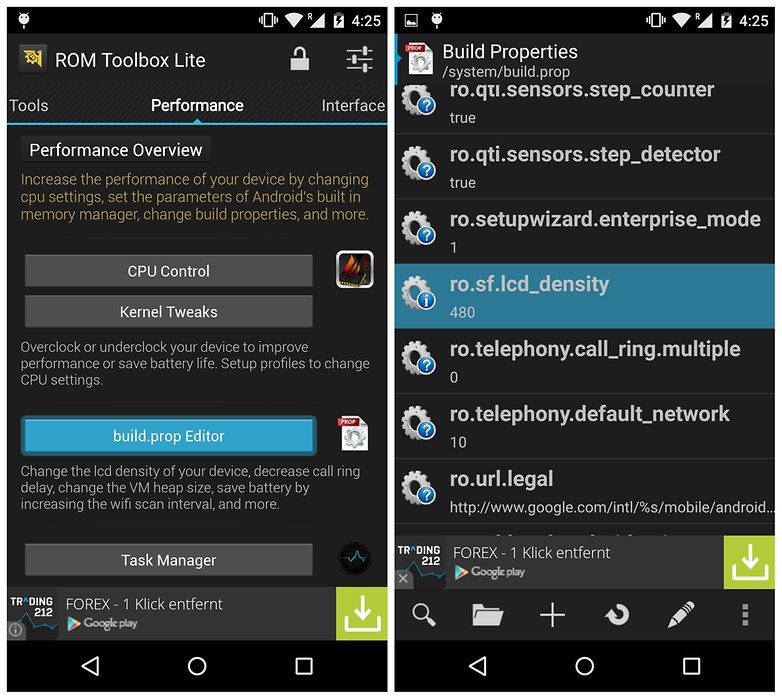
2. In the list that follows, scroll down to ro.sf.lcd_density and change the property value to whatever you like (again, we recommend 400).
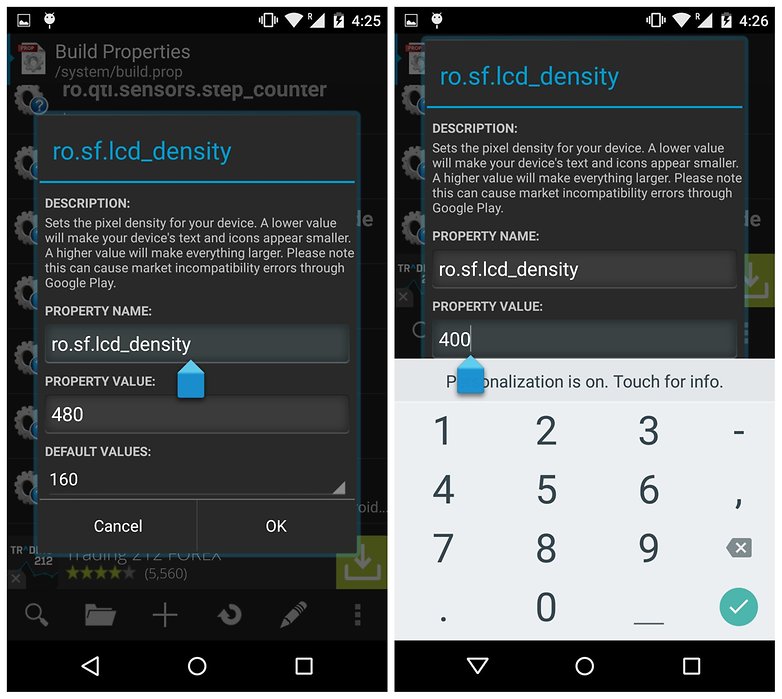
3. You may be prompted to reboot your Nexus 5. Do so. You'll now be enjoying a more compact screen, opening up more space and giving the impression of a larger screen.
ES File Explorer
Using this file manager is pretty much the exact same, it is just laid out slightly differently.
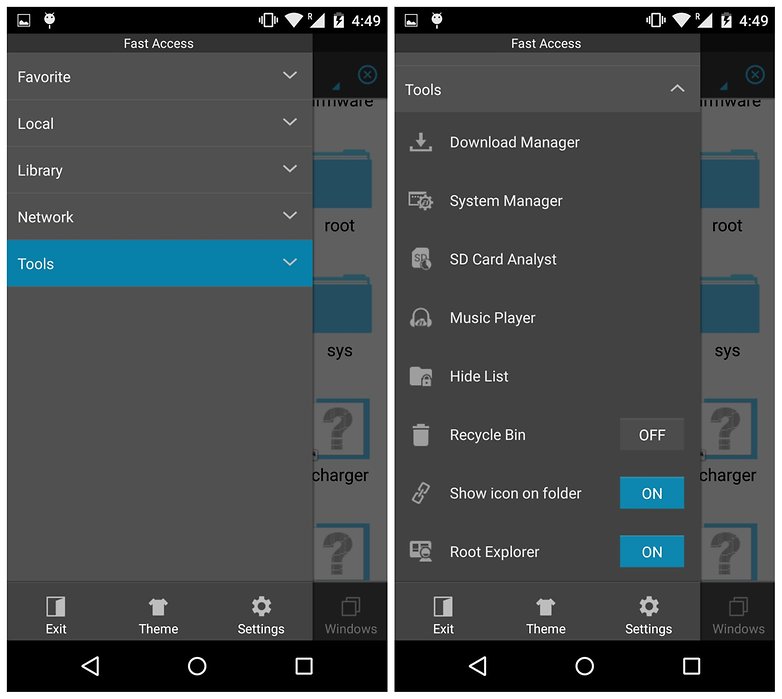
1. Go to ES File Explorer and swipe out the left-hand navigation menu.
2. Go to Tools and enable Root Explorer.
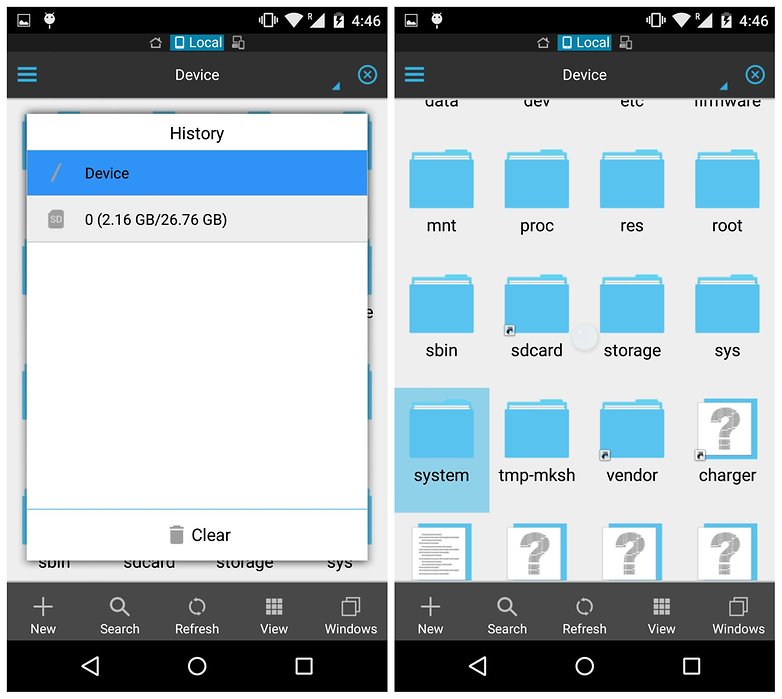
3. Now, head to /device/system
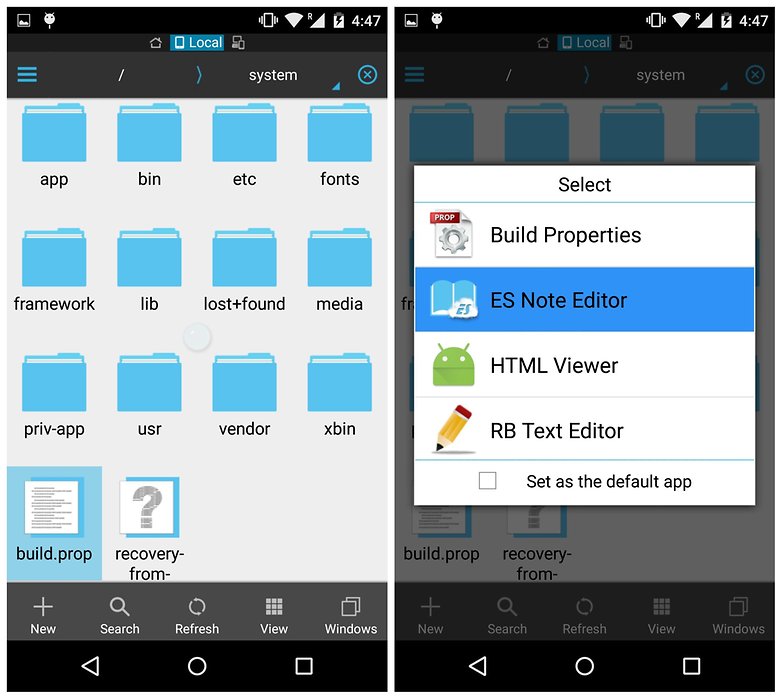
4. And tap on build.prop. You'll be asked to open the file in an editor app. Choose the one you like.
5. You'll see a long list of entries. Tap the overflow button in the top right of the screen and hit Edit. The one you want is called ro.sf.lcd_density
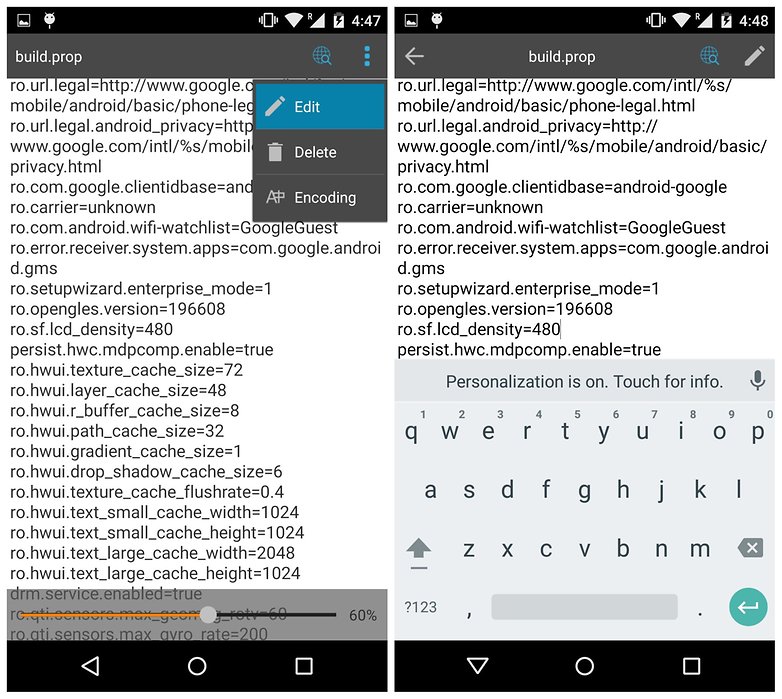
6. Change the value in the ro.sf.lcd_density line (which is 480 by default) to 400 (or whatever value you like). When you hit the Back arrow in the top left of the screen you'll be prompted to save your changes. Say yes.
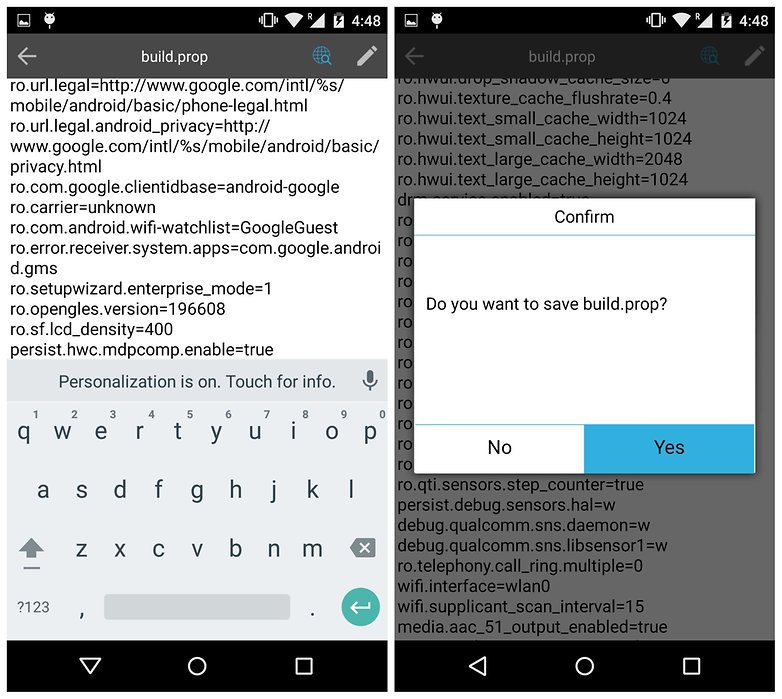
7. Once you've saved the build.prop file you just need to reboot your phone to see the change take effect.
What do you think of your new ''larger screened'' Nexus 5? What screen density do you prefer?






Although it doesn't turn the home screen icons and app drawer icons into 5 columns. I am rooted and used build prop in es explorer. I've kept it at 420.
Will this mod cause unrooted stock to fail OTA update installations?
Hi, would reducing the ppi also help in boosting battery life?
I get error type 2
android.until.AndroidException: Can't connect to window manager; is the system running?………
Please help
Or use a launcher to get this desired effect without modifying anything.
yes it is in usb debugging mode still ......
Works.. Like a charm..thanks
I tried this on Android One device (micromax AQ4501) it's working but system icon looks blurry original dpi is 240
When i tried as:-
adb shell wm density 400
or
adb shell vm density 400
I am always get the following:-
/system/bin/sh: wm: not found
/system/bin/sh: vm: not found
What is the difference between "adb shell vm density" and "adb shell wm density"?
I had no problem on changing DPI with this tutorial, but if you open whatsapp and you click on a contact, when you see the profile picture, it's too big... This is the only issue that I'm experiencing when changing the DPI. Or if you want to change your profile picture, the images are too big.
So I decided to reset the DPI at the factory defaults.
PS: I did it with the non-rooted steps!!
Try this (emulator):
adb shell wm density reset
or
adb shell vm density reset
else you can re-issue same command:
adb shell wm density <> -> to your previous value (e.g. in my Nexus5device it was 480 before)
-Pramod
Try this (emulator):
adb shell wm density reset
or
adb shell vm density reset
else you can re-issue same command:
adb shell wm density <> -> to your previous value (e.g. in my Nexus5device it was 480 before)
-Pramod
Tried this, but SwiftKey keyboard turned huge. Had to revert back to original resolution for now. Any suggestions?
Can I do it with my moto g2
I.e;can I also make my moto g2s screen bigger,will this work on my device
Can this work on a moto e first generation?
I feel its become way more smoother than it was before. Well, it's an uneducated guess...
Note for all (just for information only).. if you encounter this:
/system/bin/sh: vm: not found when running the non-rooted ADB tool way (adb shell vm density 400)
Try wm which worked for me than vm which fails in my Android kernel, that is:
<adt>\platform-tools>adb shell wm size
Physical size: 1080x1920
<adt>\platform-tools>adb shell wm density 400
<adt>\platform-tools>adb shell wm density
Physical density: 480
Override density: 400
<adt>\platform-tools>adb shell wm density reset
<adt>\platform-tools>adb shell wm density
Physical density: 480
Note.. i just reset it back to 480, you can retain or set any values you prefer. Again this needs to be tested at your side before performing on actual device and just for information purpose only.
Step 1: Buy a Nexus 6
Step 2: Enjoy your bigger screen