How to Have your iPhone Read Text Aloud
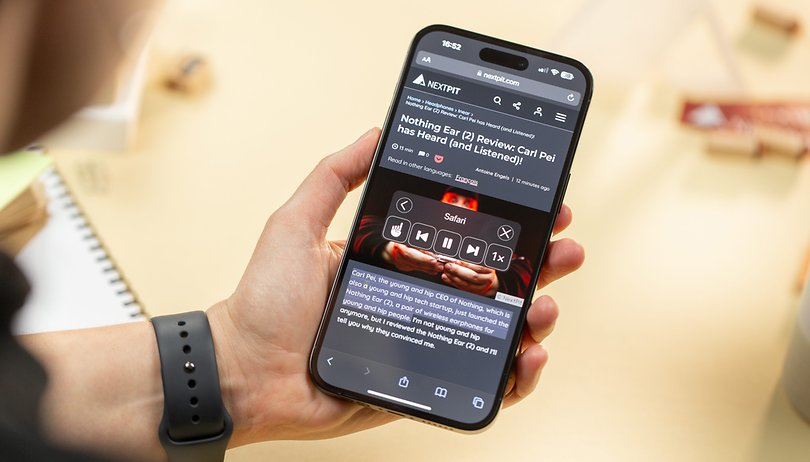

Apple offers tons of practical features for the iPhone in terms of accessibility. One of these is the option to read text from a PDF aloud. This allows people with visual impairments to listen to written content in audio format. In this guide, nextpit will tell you where you can activate this function and how to customize the feature.
How to set up your iPhone to read text aloud
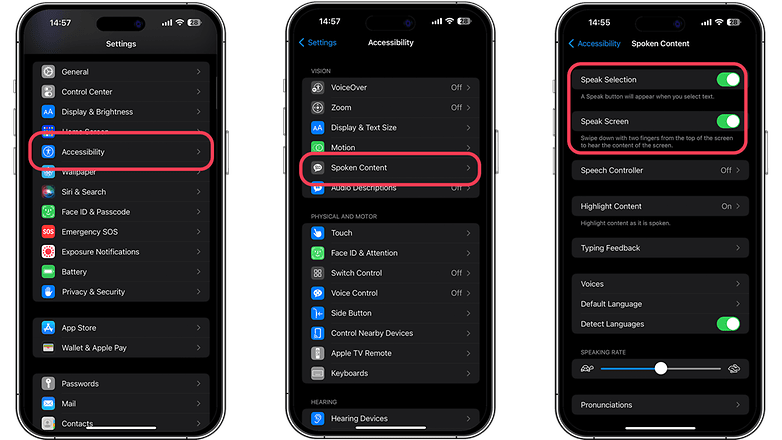
An extremely helpful function since iOS 16 was released is the option to have text read aloud. This opens up numerous use cases. You can have PDF content or entire pages read aloud if you like. As mentioned, the function has been available since iOS 16 and is located in the accessibility features under "Spoken Content". To access the speech functions for accessibility, you must first enter the "Settings" on your iPhone. Here's how to locate the function:
- Launch Settings on your iPhone.
- Navigate to the Accessibility settings.
- Activate the Spoken Content slider button.
This will take you to the settings for the text-to-speech features, including Speak Selection, Speak Screen, and Typing Feedback. Enable the Speak Selection and/or Speak Screen options, depending on your preference.
Customize language settings
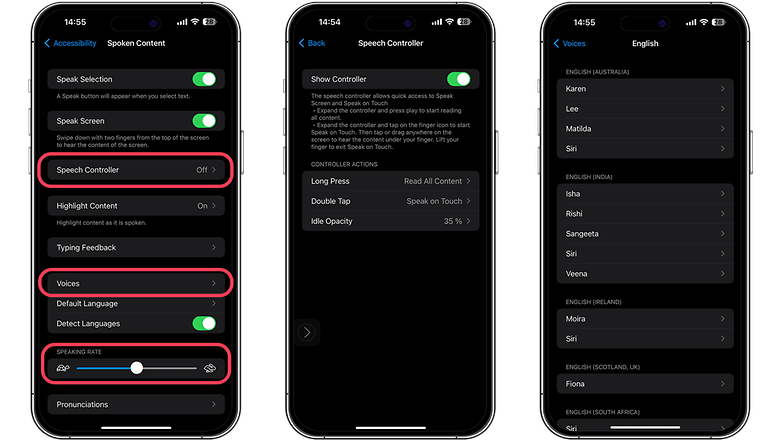
Once you have activated the "Spoken Content" function, you can adjust the settings as you wish. You can adjust the speaking rate, voice, and other options to make the experience as pleasant as possible.
Have the iPhone read texts aloud
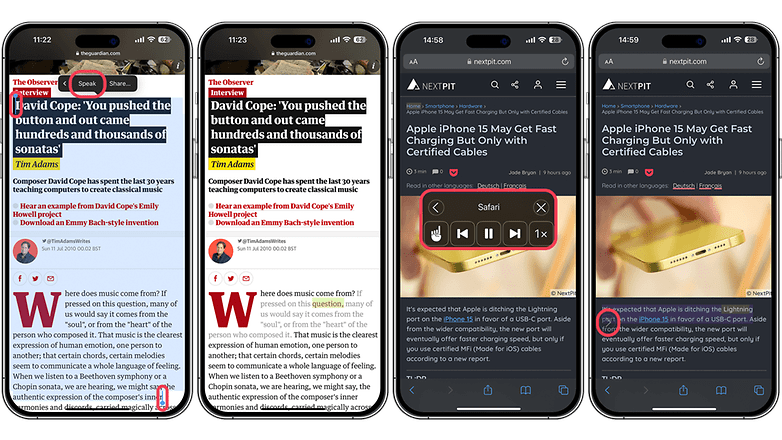
Once you've set up and customized the Spoken Content feature, it's time to use it. There are two simple methods: "Speak Selection" and "Speak Screen". This is what distinguishes the two methods:
- Use "Speak Selection" to read a specific snippet: If you have activated the language selection, you can have your iPhone read a specific text segment. Simply select the text excerpt that you want to be read aloud by pressing and holding on and dragging the selection marker. As soon as the text is highlighted, tap the "Speak" option that appears in the context menu.
- Use "Speak Screen" to read entire pages: If you want your iPhone to read an entire page or screen of text aloud, use the "Speak Screen" feature. To activate this, swipe down from the top of the screen with two fingers and your iPhone will begin reading the content aloud.
Do you know of any other helpful iOS functions that you would like to share? We'd love to hear about your favorite iPhone hacks in the comments.
This article was updated in August 2024, and the previous comments have been kept for transparency.
