
- Forum posts: 7
Oct 28, 2015, 3:02:13 PM via Website
Oct 28, 2015 3:02:13 PM via Website
Are you among those innovation-trackers who have already experienced the brand-new Marshmallow dessert from Android? This OS version has a lot of new features, most of which are internal. The one any Android developer should pay attention to is a new system of permissions. So, let’s look behind the curtains of Marshmallow and review some peculiarities of working with permissions in Android 6.0.
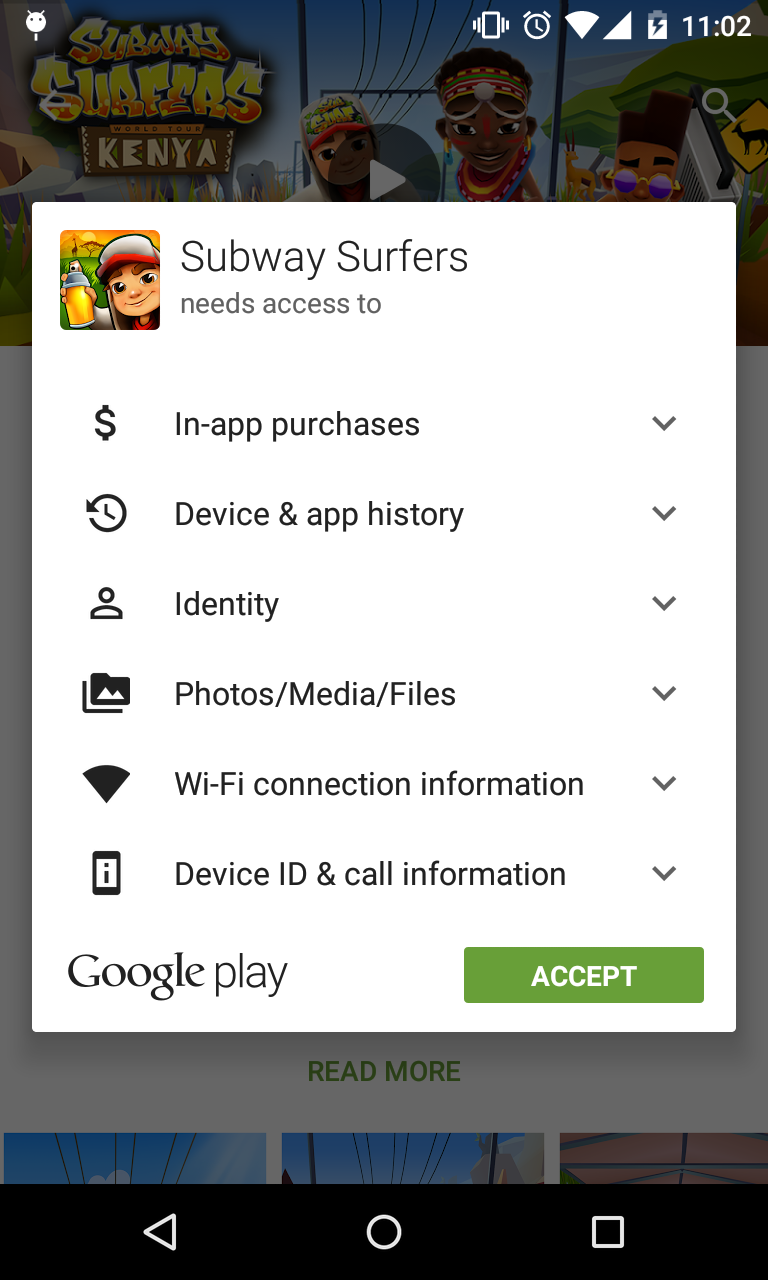
In the previous versions all permissions were requested during app installation from the Play Store:
This has been changed fundamentally in the new Android OS version. Now you can manage your permissions in the runtime.
The following are the Marshmallow permissions features every developer should keep in mind.
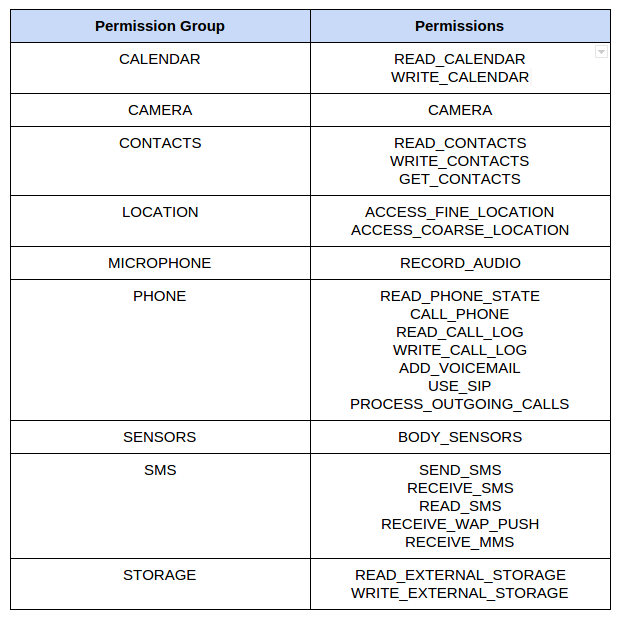
- As you may already know, all permissions are divided into two categories: normal and dangerous. Android 5.1 and older versions display dangerous permissions during installation. If a user denies them an application will not be installed at all. Starting from Android 6.0 dangerous permissions are divided into subcategories (see below), that should be separately confirmed by a user while using an app. You should remember though that if one permission from a group has been accepted, you will not be asked for additional confirmation of further ones that belong to it too.
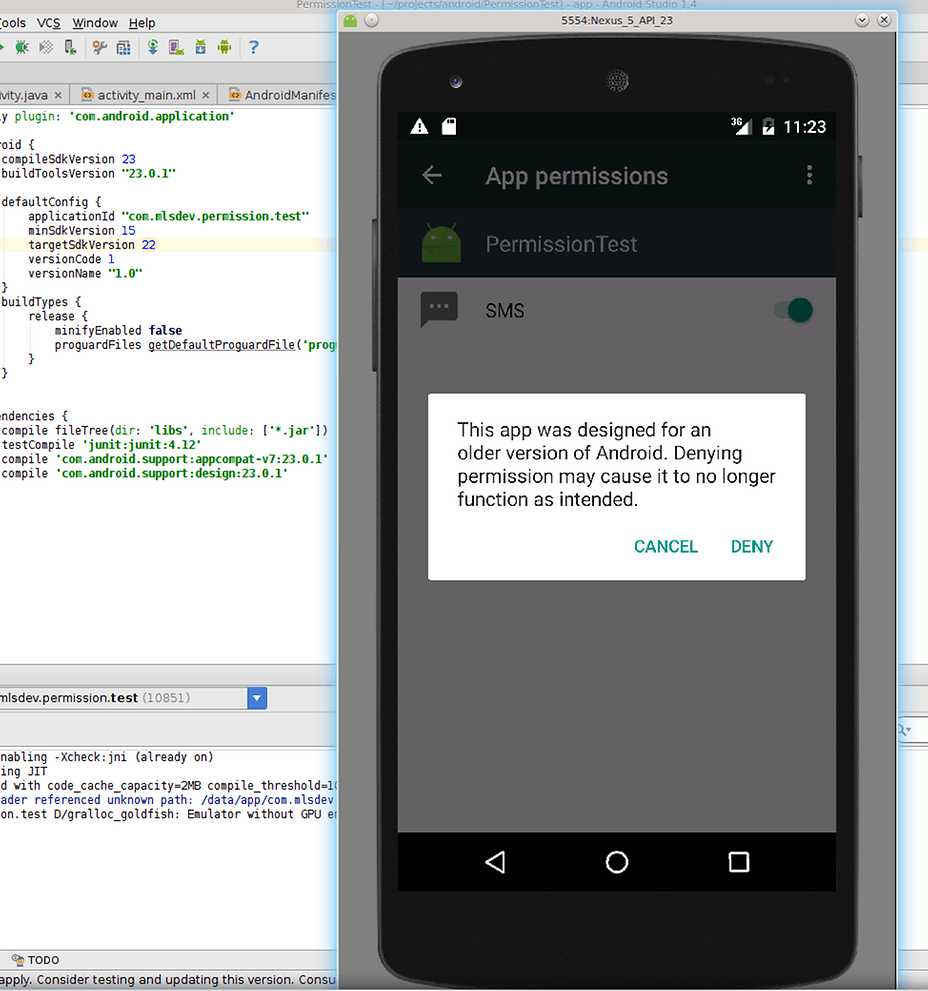
- If you specify targetSdkVersion = 22 and lower in the build.gradle file while building-up an app, you will see a usual permission confirmation dialog during its installation from the Play Store to a device running Marshmallow. All permission groups will be turned on in settings after installation. If you try to turn off the app access to one of the needed permissions, the following dialog will be displayed:
- In case build.gradle targetSdkVersion = 23, you will need to add an access request to necessary permissions and user response processing. Let’s dig deeper into details here.
If you need access to the elements that require permissions, always check it with the help of the method:
ContextCompat.checkSelfPermission(activity,Manifest.permission.< verifiable_permission >
It is strongly recommended to use the ContextCompat class method from the support-v4 library for verification, as Context.checkSelfPermission is available starting from Android 6.0 only and will cause crashes in the previous OS versions.
If this method returns the value PackageManager.PERMISSION_GRANTED, it means the permission has been confirmed and can be used now.
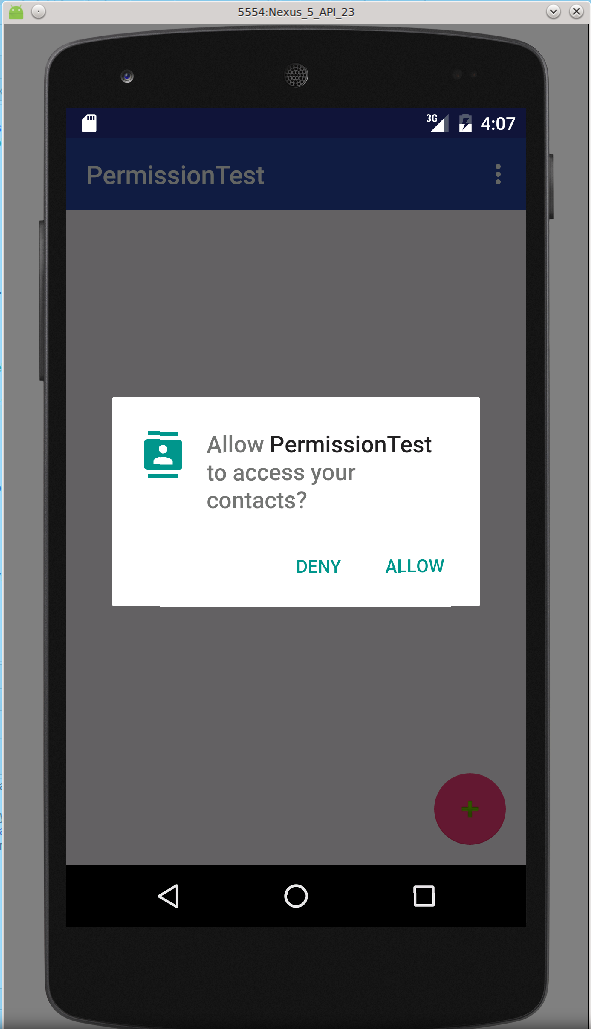
Otherwise, you need to request permission from a user. To do this, call the ActivityCompat.requestPermissions method and transfer the reference to Activity, the string array of necessary permissions and the request code as settings. If there have been no access requests to the needed permissions before, you will see a standard dialog that cannot be customized:
There is an onRequestPermissionsResult method added in Android 6.0 to process the call results. It works when a user pushes Deny or Allow buttons.
If a user presses Allow, access is confirmed and the app can go on running. No surprise about that. But what if not? In this case, further calls of ActivityCompat.requestPermissions will not display the dialog. Instead of this a developer is recommended to show a dialog with descriptions why the app needs the requested permissions. Use the ActivityCompat.shouldShowRequestPermissionRationale method and transfer the reference to Activity and permission there to check if the description is to be shown. If the method returns true, display the description and ask for access permission from a user again. This time the dialog will look different:
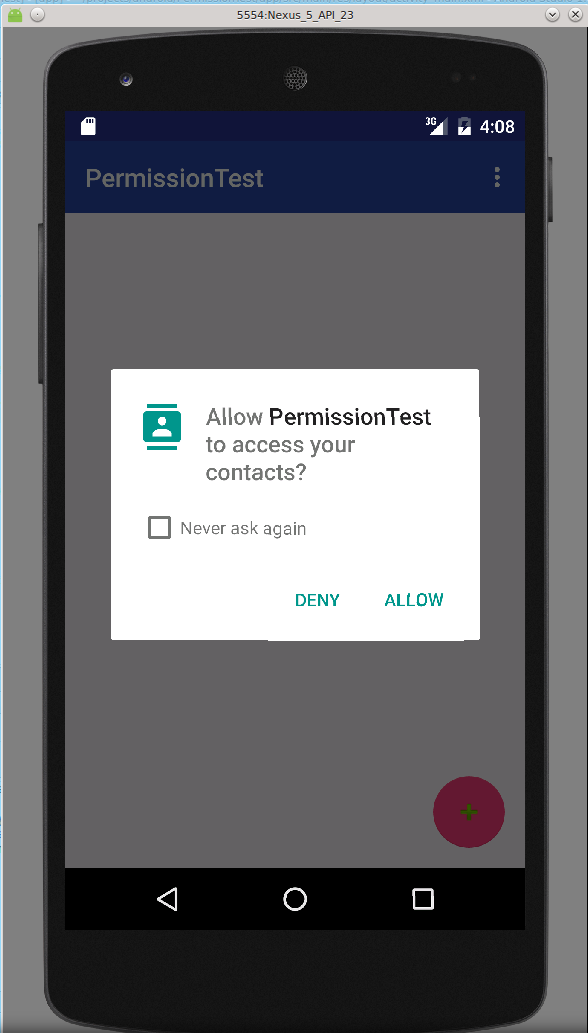
If a user presses Deny in this dialog and chooses Never ask again, all further calls of ActivityCompat.shouldShowRequestPermissionRationale will return false, and the ActivityCompat.requestPermissions call will not display the permission dialog. PERMISSION_DENIED will immediately return to onRequestPermissionResult instead.
There is a possibility to request a few permissions at a time, but official guidelines do not recommend to do that, except the case when a few permissions are required to appear on the same screen simultaneously.
As stated above, the ActivityCompat.requestPermissions method accepts the reference to Activity and the string array of necessary permissions as input parameters. You can indicate a few needed permissions in this string array and thus a user will see a separate dialog for each of them.
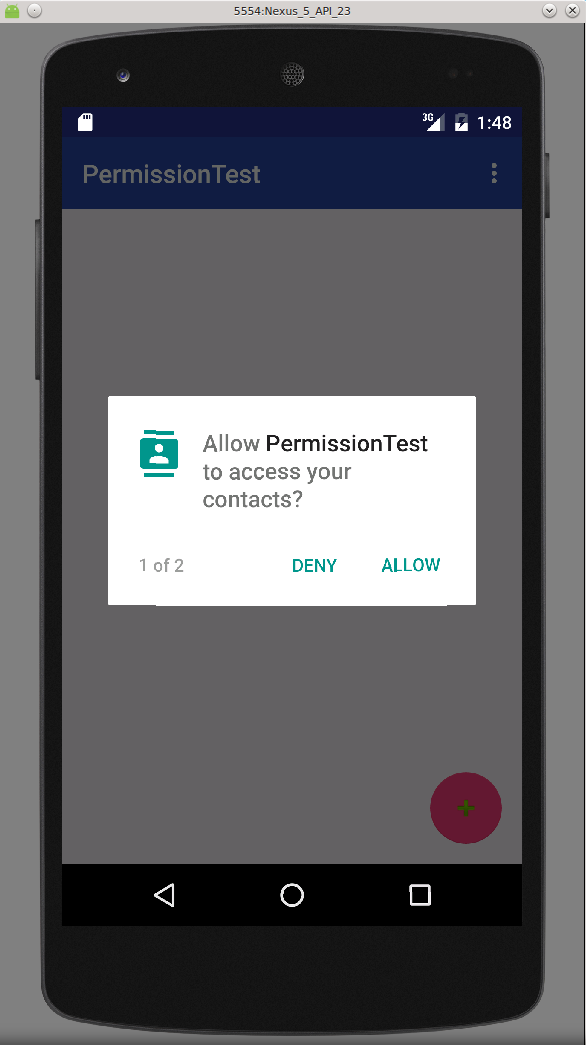
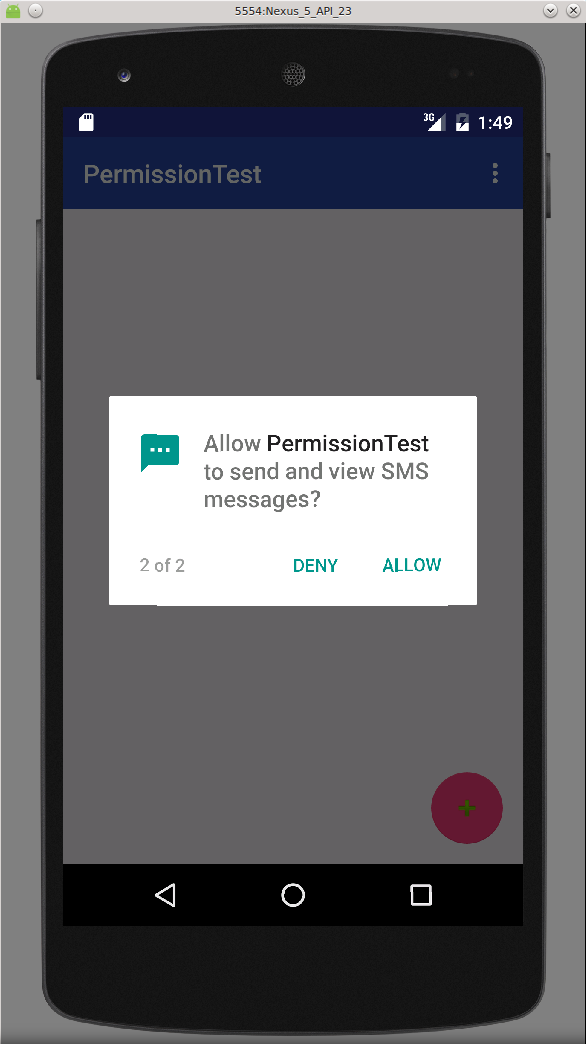
As a result, access parameters for each requested permission will be transferred to the onRequestPermissionsResult method.
This all is actually one more additional task to include into the general scope of application development activities but such individual permissions are more secure. Android gives its users the possibility to control and personalize the OS on their devices so don’t forget about that when creating apps for its Marshmallow and up versions.


