How to disable encryption on the Nexus 6 to make it faster


We've previously shared some hot tips on how to speed up the Nexus 6, but today we're sharing a slightly more severe method: disabling the Nexus 6's forced encryption. While automatic encryption is great from a security standpoint, all that encrypting and decrypting slows everything down. So now we'll show you how to speed up the Nexus 6 by disabling forced encryption.
- Android Lollipop and security: what you need to know
- Why you might want to decrypt your Android phone
Note: As you can probably guess, this requires replacing the existing Nexus 6 kernel with one that doesn't force encryption. You will still be able to encrypt your Nexus 6, it just isn't encrypted by default. You'll also need to wipe your data for this to work, so do a backup before you proceed. Finally, you'll need an unlocked bootloader so you can flash the kernel.
Prerequisites
- Unlocked Nexus 6. if you need help, use Boot unlocker for Nexus Devices (linked below)
- USB Debugging enabled
- ADB Tools or the Android SDK (ADB Tools is smaller and enough to do the job)
- A backup of your Nexus 6 data
How to disable forced encryption on the Nexus 6
1. Ensure your Nexus 6's bootloader is unlocked.
2. Make sure you have USB Debugging enabled in Developer Options (if you don't have this setting yet, go to Settings > About Phone and tap Build number seven times until you see the notification that Developer options has been enabled. Now, go to Settings > Developer option and check the box for USB Debugging.)
3. Do a full backup of your Nexus 6 as this process will wipe your device.
4. Download the file below (on your PC) that corresponds to the version of Android that you are currently running. You must install the same build number or you will have problems. To see which build number you have, go to Settings > About Phone > Build Number.
- Stock Android 5.1 (LMY47D/LMY47E/LMY47M/LMY47I)
- Stock Android 5.0.1 (LRX22C)
- Stock Android 5.0 (LRX210)
5. Turn off your Nexus 6.
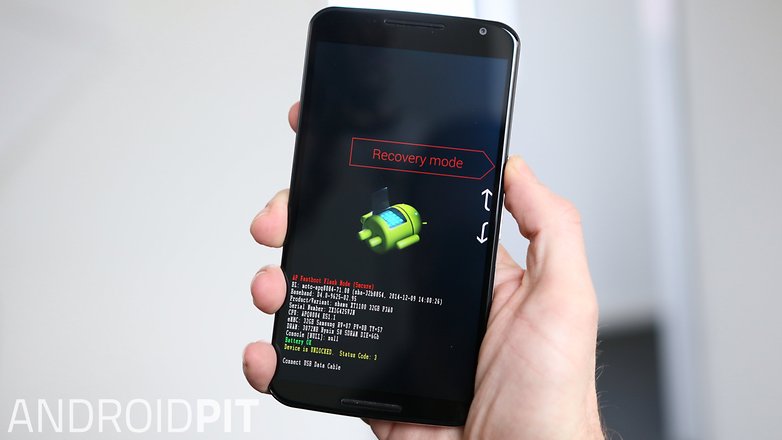
6. Reboot your Nexus 6 into bootloader mode. To do this, press and hold Power and Volume Down. If you see the Android robot on its back, press Power and Volume Up to access the bootloader.
7. Connect your Nexus 6 to you PC with a USB cable.
8. On your PC, navigate to the ADB Tools folder and move the downloaded file there.
9. In some blank space of the window, hold Shift and right click your mouse. Select open Command Window Here.
10. Type in the following command to flash the modified kernel without forced encryption (substitute the correct file name for the file you downloaded):
fastboot flash flash boot bootimg_noforceencrypt_lmy47d.img
(Don't worry that the build number in the file name may not match your specific 5.1 build. The same kernel works for all Android 5.1 builds.)
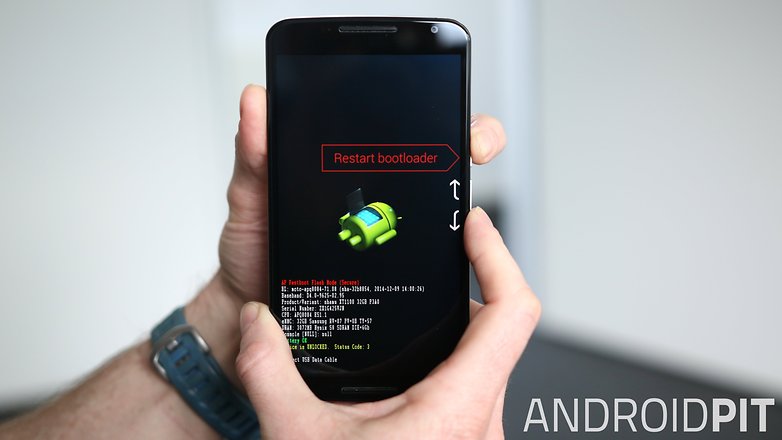
11. Once you've flashed the kernel successfully, reboot your Nexus 6 to the bootloader.
12. Back on your PC, enter the following command to wipe your user data:
fastboot format userdata
13. Reboot your Nexus 6, restore your apps and data and enjoy the additional speed without forced encryption.
Have you noticed your Nexus 6 is faster without encryption?


If we are running a custom ROM, say cyanogenmod, will loading the above kernel(s) cause issues?
Just in case, even though this article is 6mo+ old... you can ue ADB for MAC just use ./fastreboot or the equiv...put a period and forward slash before commands...lol just a tip
Use BootUnlocker? - From this app's description in the play store; "Nexus 6 and Nexus 9 are not supported yet." - How is this article supposed to be accurate?
It is also worth mentioning that the device must be rooted before the boot can be unlocked.
Furthermore, ADB Tools is windows only, so how does a Mac user do it, using the SDK for instance?
Forma Linux and Mac search the thread "adb-guide-updated-2014-11-11.443072" in androidforums
The command did not work for me in the command window. It says "boot" isn't a command or something
try this instead no space in between the second flash and boot
fastboot flash flashboot bootimg_noforceencrypt_lmy47d.img
Will this work with a Mac?